Step 2.b Some important steps following creation
Upload your key to a keyserver
We will upload your key to a keyserver, so if someone wants to send you an encrypted message, they can download your public key from the Internet. There are multiple keyservers
that you can select from the menu when you upload, but they are mostly all copies
of each other. Any server will work, but it's good to remember which one you uploaded your key to originally. Also keep in mind, sometimes takes a few hours for them to match each other when a new key is uploaded.
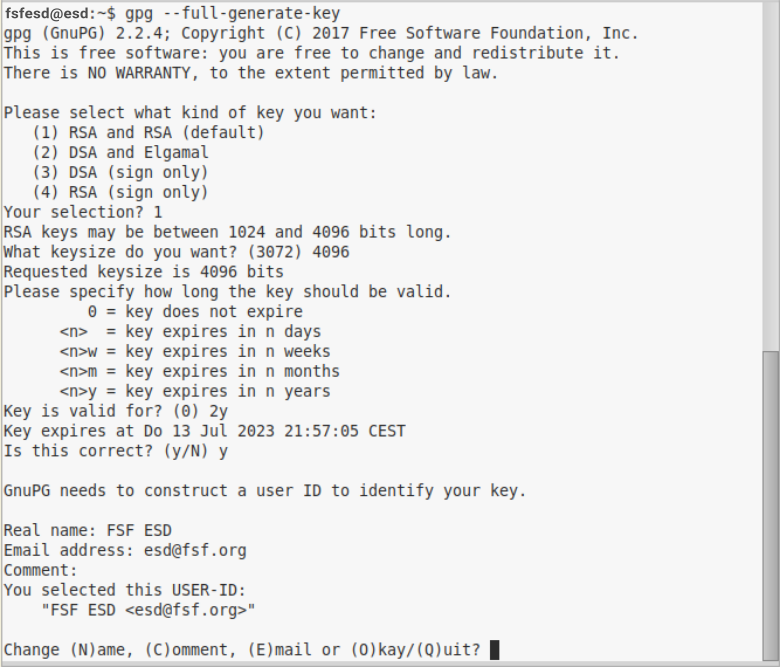
# Copy your keyID: gpg --list-key [your@email] will list your public ("pub") key information, including your keyID, which is a unique list of numbers and letters. Copy this keyID, so you can use it in the following command.
# Upload your key to a server:
gpg --send-key [keyID]
Export your key to a file
Use the following command to export your secret key so you can import it into your email client at the next step. To avoid getting your key compromised, store this in a safe place, and make sure that if it is transferred, it is done so in a trusted way. Exporting your keys can be done with the following commands:
$ gpg --export-secret-keys -a [keyID] > my_secret_key.asc

$ gpg --export -a [keyID] > my_public_key.asc
Generate a revocation certificate
Just in case you lose your key, or it gets compromised, you want to generate a certificate and choose to save it in a safe place on your computer for now (please refer to Step 6.C for how to best store your revocation cerficate safely). This step is essential for your email self-defense, as you'll learn more about in Section 5.
# Copy your keyID: gpg --list-key [your@email] will list your public ("pub") key information, including your keyID, which is a unique list of numbers and letters. Copy this keyID, so you can use it in the following command.
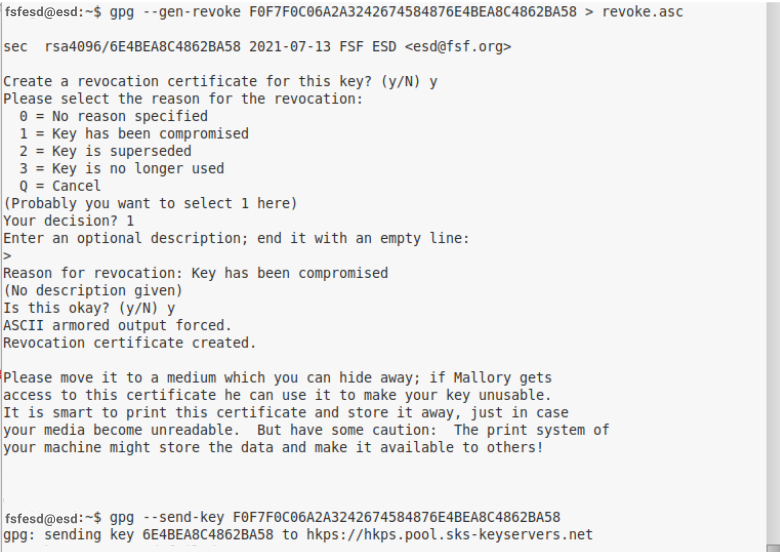
# Generate a revocation certificate: gpg --gen-revoke --output revoke.asc [keyID]
# It will prompt you to give a reason for revocation, we recommend to use 1 = key has been compromised.
# You don't have to fill in a reason, but you can; then press "Enter" for an empty line, and confirm your selection.
Troubleshooting
- Sending my key to the keyserver is not working
- Instead of using the general command to upload your key to the keyserver, you can use a more specific command and add the keyserver to your command
gpg --keyserver keys.openpgp.org --send-key [keyID].
- My key doesn't seem to be working or I get a "permission denied."
Like every other file or folder, gpg keys are subject to permissions. If these are not set correctly, your system may not be accepting your keys. You can follow the next steps to check, and update to the right permissions.
# Check your permissions: ls -l ~/.gnupg/*
# Set permissions to read, write, execute for only yourself, no others. These are the recommended permissions for your folder.
You can use the command: chmod 700 ~/.gnupg
# Set permissions to read and write for yourself only, no others. These are the recommended permissions for the keys inside your folder.
You can use the code: chmod 600 ~/.gnupg/*
If you have (for any reason) created your own folders inside ~/.gnupg, you must also additionally apply execute permissions to that folder. Folders require execution privileges to be opened. For more information on permissions, you can check out this detailed information guide.
- Don't see a solution to your problem?
- Please let us know on the feedback
page.
Advanced
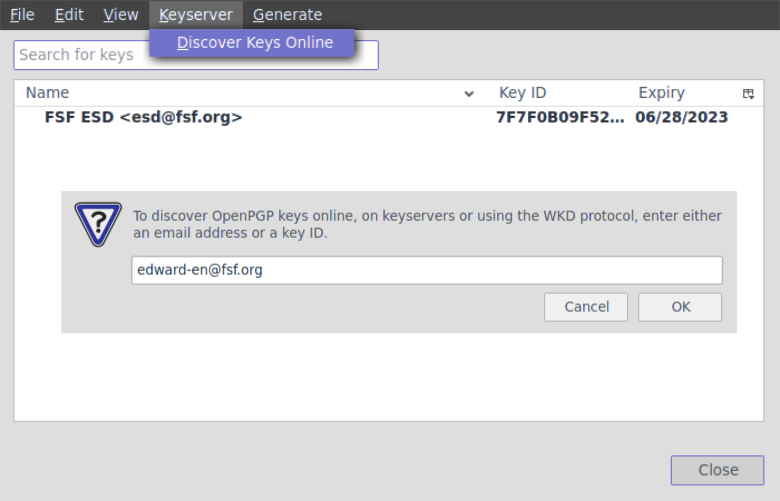
- More about keyservers
- You can find some more keyserver information in this manual. You can also directly export
your key as a file on your computer.
- Transferring your keys
-
Use the following commands to transfer your keys. To avoid getting your key compromised, store it in a safe place, and make sure that if it is transferred, it is done so in a trusted way. Importing and exporting a key can be done with the following commands:
$ gpg --export-secret-keys -a [keyID] > my_private_key.asc

$ gpg --export -a [keyID] > my_public_key.asc

$ gpg --import my_private_key.asc

$ gpg --import my_public_key.asc
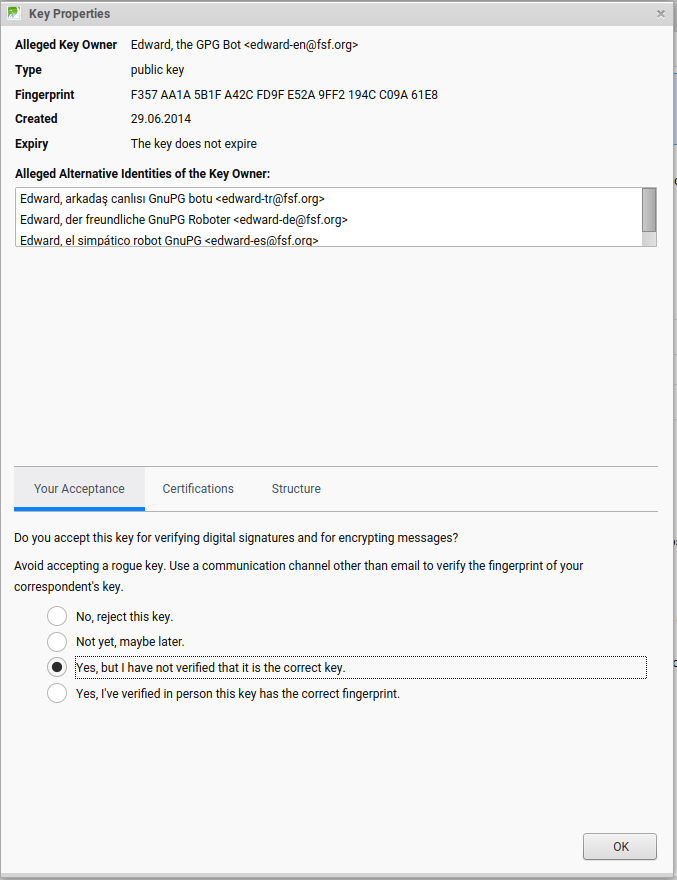
Ensure that the keyID printed is the correct one, and if so, then go ahead and add ultimate trust for it:
$ gpg --edit-key [your@email]
Because this is your key, you should choose ultimate. You shouldn't trust anyone else's key ultimately.
Refer to Troubleshooting in Step 2.B for more information on permissions. When transferring keys, your permissions may get mixed, and errors may be prompted. These are easily avoided when your folders and files have the right permissions
![[GNU Social]](../static/img/gnu-social.png)
![[Mastodon]](../static/img/mastodon.png)
![[Reddit]](../static/img/reddit-alien.png)
![[Hacker News]](../static/img/hacker-news.png)